V.A.R.I.S. Pro
Video Anime Rental Information System
Administrator Manual
Table of Contents
System
Specifications (What we Used)
Introduction
Welcome!
Hello and welcome to the Team 1 Video Anime Video
Rental Information System (V.A.R.I.S).
This system was developed by Team 1 as a class project for a Systems
Development class at the
The project was developed because Ed Dennis, the owner of a small video rental store called Pop Kulture needed a more organized and efficient way to keep track of his rentals, especially those that were overdue, than his current notecard-in-a-shoebox system.
Team 1 considered several different options when initially deciding how to implement this system, from a Rolodex version of the shoebox to a simple Microsoft Access Database, to writing new software. In order to best tailor the solution to the situation, the team decided to take the new software approach, and used the programming skills of one of its members to create the database in MySQL, using C# to build the interface.
If you’re reading this, you probably have the task of figuring out exactly how this system works and how to either administer or update it. This manual, in conjunction with the team notebook compiled by Team 1 during this semester contains the information you need to do just that.
System
Minimum System Requirements
Operating System: Windows NT, 2000, or XP
Processor: Pentium Pro 166 MHz or equivalent
Memory: 128 MB RAM
Hard drive space: 10 megabytes
Video card
Keyboard
Mouse
System Specifications (What we Used)
Operating System: Windows XP Home with Service Pack 1
Memory: DDR 256Mb,
32x64-PC2100 SDRAM
Main Board: ECS K7S5A Pro Mainboard
266Mhz FBS 384K CAS. 1.75V 1667 Bare
CPU: Athlon XP
2000+
CDRW: Sony 52x24x52x
Hard Drive: Western Digital 7200RPM 80Gb
Graphic Card: PNY nVidia Geforce
4 4.64Mb
Software Versions:
Windows XP Home with Service Pack 1
Microsoft .NET Version 1.1
MySQL version 4.0.12-Win
Designing the System
Database Design
Though the Database structure is quite simple, perhaps it would be helpful to understand the exact thought process behind its development. We chose a relational database because, well, it’s the most useful for what we were doing and most databases are relational anymore. At first we considered just having two tables (entities): a customer table and a video table with a one-to-many relationship; in this setup, each customer could rent multiple videos, but every video could be rented to only one customer at a time.
This would have worked just fine, except that the owner of the shop wanted to be able to keep track of past rentals and be able to generate certain reports. This created a problem because suddenly the relationship became many to many and there would have to be multiple rental fields in one or both of the tables. The solution was quite simple. We created a third table, a relational entity, that contained the primary keys from the two other tables, plus information such as rental date and due date that could be used later to generate the desired reports.
As the primary key for the renter, we chose the driver’s license number because the shop already collected this information and it was the best way to make sure the primary keys would always be unique. This number was never to be used anywhere else but as this key. To create a unique primary key for the video table, we decided on the driver’s license because of its status as a unique identifier. Finally, as the primary key for the joiner table we chose the rental date because it was highly likely that a renter may rent a video a second time, but very unlikely that a renter would rent one video a second time on the same day.
Entity-Relationship Diagram
The following is an Entity –Relationship Diagram for the V.A.R.I.S. Pro System.
Entity Relationship Diagram Key Rev 1-030421:
The following is intended to be a basic guide to the ERD for the V.A.R.I.S. system. For a more complete definition of the Table fields, please consult the Data Dictionary.
The format is as follows:
Field Name – short description of field. Reason for chosen name/implementation if necessary.
Reason for inclusion in table: gives the business logic for the existence of the field.
Rental Customer
Table:
Primary Key: Renter I.D.
Renter I.D. - an alias for Texas Driver’s License or Texas Identification Number.
Reason for selection as Primary Key: this number is uniquely identifies every individual, and provides positive proof of identification.
MySQL Field Name: r_id
First Name – self-explanatory.
Reason for inclusion in table: required for business records.
MySQL Field Name: fname
Middle Name – self-explanatory.
Reason for inclusion in table: required for business records.
MySQL Field Name: mname
Last Name – self-explanatory.
Reason for inclusion in table: required for business records.
MySQL Field Name: lname
Address – self-explanatory.
Reason for inclusion in table: required for business records.
MySQL Field Name: addr
City – self-explanatory.
Reason for inclusion in table: required for business records.
MySQL Field Name: city
State – self-explanatory.
Reason for inclusion in table: required for business records.
MySQL Field Name: st
Zip Code – self-explanatory.
Reason for inclusion in table: required for business records.
MySQL Field Name: zip
Primary Telephone Number – self-explanatory. Due to the varying age demographics of Pop Kulture, a generic name for this field is appropriate, rather than a “Home Telephone/Work Telephone” field. Example: a customer may only have a Home telephone and Mobile telephone numbers.
Reason for inclusion in table: required for business records.
MySQL Field Name: pphone
Secondary Telephone – self-explanatory. Due to the varying age demographics of Pop Kulture, a generic name for this field is appropriate, rather than a “Home Telephone/Work Telephone” field. Example: a customer may only have a Home telephone and Mobile telephone numbers.
Reason for inclusion in table: required for business records.
MySQL Field Name: sphone
E-mail Address – self-explanatory.
Reason for inclusion in table: See path-forward documentation.
MySQL Field Name: email
Credit Card Holder First Name – self-explanatory.
Reason for inclusion in table: This field was included so that the person who does the renting does not have to be the person who signed the rental contract with Pop Kulture. This allows minors to rent with their parent’s rental contract, and allows couples to use one credit card for multiple accounts.
MySQL Field Name: cchfname
Credit Card Holder Last Name – self-explanatory.
Reason for inclusion in table: This field was included so that the person who does the renting does not have to be the person who signed the rental contract with Pop Kulture. This allows minors to rent with their parent’s rental contract, and allows couples to use one credit card for multiple accounts.
MySQL Field Name: cchlname
Credit Card Type – self-explanatory.
Reason for inclusion in table: required for business records.
MySQL Field Name: cctype
Credit Card Number – self-explanatory.
Reason for inclusion in table: required for business records.
MySQL Field Name: ccnum
Credit Card Expiration Date – self-explanatory.
Reason for inclusion in table: required for business records.
MySQL Field Name: ccexp
Penalties Owed (optional) – this is an integer value equal to the number of days late. This implementation allows Pop Kulture to change the Late Fee without having to set any values in the V.A.R.I.S. application.
Reason for inclusion in table: required for business transactions.
MySQL Field Name: penowd
Misc. Notes (optional) – text field. This implementation was decided to be more flexible and less time consuming than a series of check boxes or radio buttons to cover every possible flag that could be placed on a record.
Reason for inclusion in table: assisting business decisions involving a single customer, such as allowing rental or purchases on credit and waving late fees.
MySQL Field Name: notes
Date of Last Rental (optional) – self-explanatory.
Reason for inclusion in table: business analysis purposes.
MySQL Field Name: lastRental
Rental Video
Table:
Primary Key: Video I.D.
Video I.D. – an integer assigned by the database.
Reason for selection as Primary Key: This implementation was adopted because there was not an obvious unique identifier for the rental videos and Pop Kulture did not desire to create a video numbering system.
MySQL Field Name: v_id
Title – self-explanatory.
Reason for inclusion in table: required for business transactions.
MySQL Field Name: title
Volume Number (optional)- integer value.
Reason for inclusion in table: Many Anime videos are compilations of television series that can span several DVD’s. This field was added to give the option of tracking volumes from a field other than the title field.
MySQL Field Name: volnum
Genre – self-explanatory.
Reason for inclusion in table: See path-forward documentation.
MySQL Field Name: genre
Video Condition Notes (optional) – Text Field.
Reason for inclusion in table: allows for damage tracking and prevents customers for being charged for damage that they did not cause.
MySQL Field Name: vcondition
Number of Rentals (optional) – integer value that is incremented for each rental transaction.
Reason for inclusion in table: business analysis purposes.
MySQL Field Name: numrent
New Release (optional) – Boolean variable.
Reason for inclusion in table: There is higher demand for new releases, so they must be more carefully monitored for late fees.
MySQL Field Name: new
Rental Record
Table:
Primary Key: Renter I.D. (Foreign Key), Video I.D. (Foreign Key), Rental Date
Renter I.D. – See entry under Rental Customer Table.
Video I.D. – See entry under Rental Video Table.
Rental Date – self-explanatory.
Reason for selection as Primary Key: This implementation was adopted to allow a renter to re-rent a video without affecting the integrity of the table. It was highly likely that a renter may rent a video a second time, but very unlikely that a renter would rent one video a second time on the same day.
MySQL Field Name: rentdate
Return Date (optional) – self-explanatory.
Reason for inclusion in table: this allows the Rental Record Table to also serve as the customer’s rental history table in addition to tracking currently active rental.
MySQL Field Name: duedate
System Design
(Or, how we got from the design to the program)
Systems design
process:
To get an idea of how the program should be laid out, the programmer studied the data flow diagrams, process specifications, and ERD done in a previous semester
1. Instead of generating pseudocode, the programmer used his previous programming experience to determine what program features were required and the best method of implementing them.
- One exception was the auto-complete feature. This required lots of testing programs and algorithm analysis on the part of the programmer.
- To create a form, the programmer focused on one field or variable, and then expanded it from there.
- One of the goals of the system was to reduce the amount of data required of the user. This is evidenced in the auto-complete feature.
- The program contains three modules: the database, the database interface, or DBI, and the front-end.
- The database is a MySQL database named ‘popk.sql’.
- The database interface is written in C#, and was taken from a repository of open-source software called Sourceforge. It serves to deliver data to and from the front-end and the database.
- The front-end is written in C#, and communicates only with the database interface. It handles all non-database related actions, such as switching tabs.
Reasons for system
specifications:
The database is created in MySQL, chosen because it was open-source. The front-end and database interface are written in C# because of its native GUI support and better performance with databases than Visual Basic. Also, C# is a relatively new programming language, and the programmer wanted to see how well it would function in an enterprise-level program.
Advice for potential
program rewriters:
First, study the DFDs, process
specs, and ERD. This will greatly help you in planning out the program. Then, prepare
pseudocode
[need my part on the computer in the lab]
Administrator Functions
Installation:
To begin, insert the CD-ROM into the drive. This will cause a window that looks like this to appear:
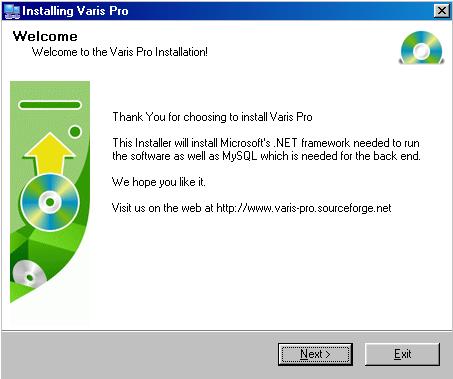
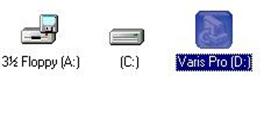
If the window does not appear, go to ‘My Computer’ and double-click your CD-ROM drive.
Click ‘Next >’ to proceed to this screen:
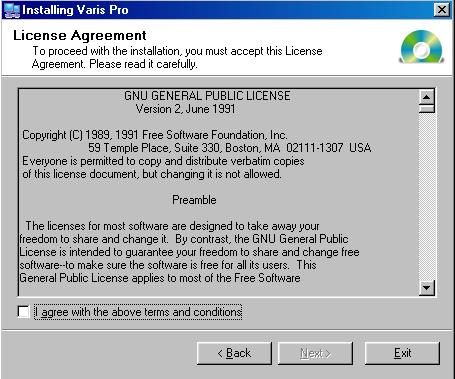
Click on the box next to ‘I agree with the above terms and conditions’ and then click ‘Next >’, which will lead you to this screen:
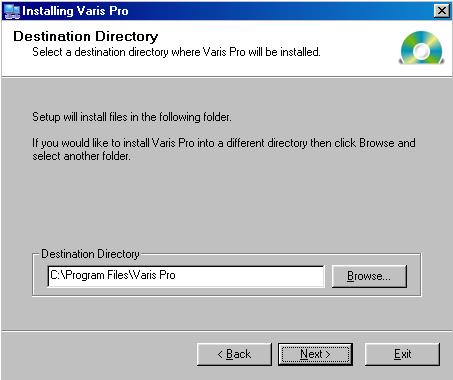
Choose the destination directory and click ‘Next >’ to begin installing Varis Pro. Click ‘OK’ when the program asks you if you want to install Microsoft .NET and MySQL.
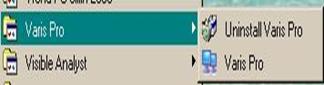
When the program has finished installing, two shortcuts will appear on your computer, one on your desktop and the other in your start menu under Start-> Programs -> Varis Pro.

Uninstallation:
To uninstall the program, click the ‘Uninstall Varis Pro’ icon in the Varis Pro directory. This window will appear to confirming the uninstall:
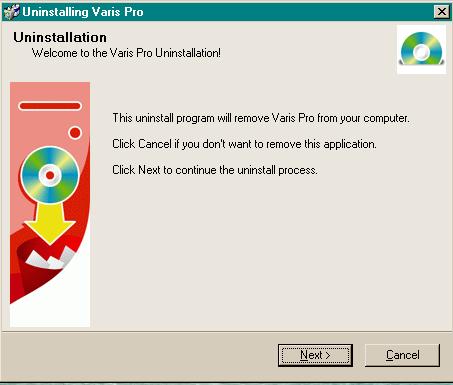
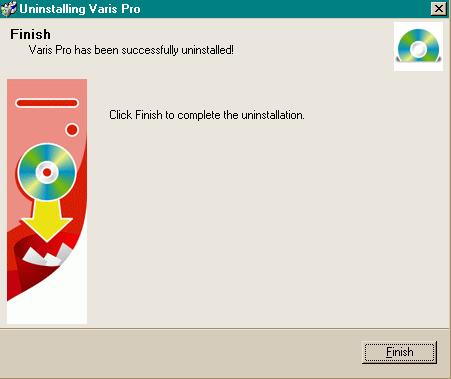
To uninstall the program, click ‘Next >’. After the program is uninstalled, this window will appear.
Setting up the database:
The Varis Pro client uses a MySQL version 4.0.12-Win database as its back-end. The name of the database used is ‘popk.sql’.
To set up the database, run the file ‘setup.exe’ located in the C:\Program Files\Varis Pro\MySQL directory. This will initialize the database and prepare it for interaction with the Varis Pro program.
Configuring the program:
The system administrator can modify certain settings using
the User Options choice in the menu (see pp. xxx)
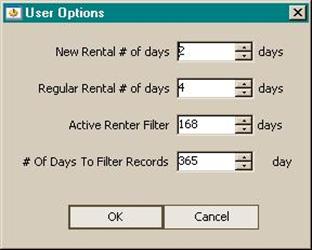
New Rental # of Days: Defines the amount of time a new tape can be rented.
Regular Rental # of Days: Defines the amount of time a regular tape can be rented.
Active Renter Filter: Amount of time since the last rental a person is categorized as active.
# Of Days To Filter Records: If a user hasn’t rented a video in this amount of time, they are purged from the database.
Making modifications:
New fields:
The database contains fifty extra fields for data, which are labeled in the database as ‘extra1’ through ‘extra50’. These can be setup to contain new data by someone who is familiar with MySQL. The main program contains a class that mirrors the database, named ‘customer&video’. Changes to the database require this class to be changed as well.
For example, suppose that the user wanted a field to contain the year a video was released. This would be accomplished by loading the main module into Visual Studio, adding the field to the Video tab, updating the ‘add’ and ‘update’ event structure to add this field’s contents to the database, and using one of the ‘extra[1-50]’ fields to contain the new data.
Any changes to how the data is presented should be made in the main form. For example, suppose the user decided that the ‘Secondary Phone’ field should not be visible in the customer menu. This would be accomplished by editing the form
Naming Conventions:
Here is the variable naming conventions used in the program
front-end:
Tab_Name_WhatItIs
“Tab” is the tab that the variable appears in, “name” is the name of the field, and “WhatItIs” is the information about the variable.
Examples:
customer_lname_lastname
video_vtitle_videotitle
User’s Manual
Navigation
Between Tabs:
There are two ways to navigate around the main tabs and sub-tabs of the program:
Navigation Tabs:
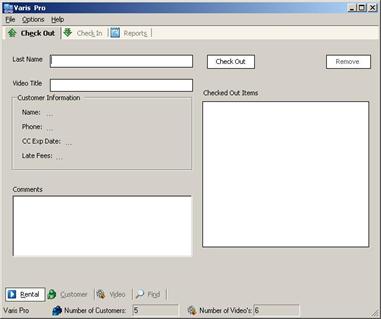
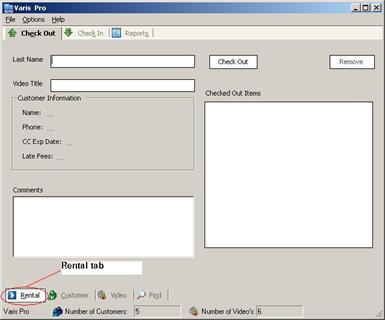
a. At the bottom of each page are navigation tabs labeled Rental, Customer, Video, and Find. Simply click on the name of the desired tab to go to that tab. (see #2 of Figure Below).
b. In the Rental Tab, there are three additional tabs labeled “Check In,” “Check Out,” and “Reports.” These tabs go to the Rental Subscreens (See # 1 of Figure Below).
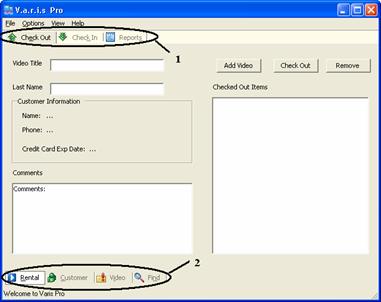
Figure 1: Navigation Tabs
1: The main Tabs 2: The Rental Tab Subtabs
Hot Keys:
- A letter under the word on each tab or menu header is underlined.
d. Hold down the “Alt” key.
e. Press the letter of the desired tab or menu.
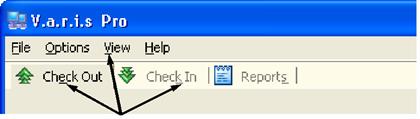
Figure 1: Hot Keys
Hold “Alt” And Press the
underlined letter to go to the desired tab or menu
Within Tabs
There are also several ways to move around within each tab:
1. Mouse Click: Click on a Text Field to put the Cursor there or on a Button to press that Button. When you run your mouse over a button, it will darken. When you “Tab” to a button, a dotted line will appear around the name of that button.
Figure 2: Mouse Over "Update Button" on "Customer" Tab
Figure 3: Tab to same "Update" Button
2. Click and Drag: Click in a Text Field that already has text in it hold down the left mouse button to drag. The text will be highlighted. Any text entered while text is highlighted will replace the highlighted text.
3. Shift + Arrow Key: In a Text Box that already holds text, hold the shift key while pressing the right or left arrow keys to highlight characters. Highlighting will begin where the cursor was when the shift key was first held down, and end at the current position of the cursor.
Figure 4: "draig" highlighted by mouse or shift + arrow
4. Tab Key: If the cursor is on a Text Field, Press the “Tab” Key to move to the next Text Field or Button. If text is already in the text box, the cursor will move to the end of the text or highlight the text, depending on the field. To highlight text that is not highlighted, see “Shift + Arrow Key” above.
5. Enter Key: If the Cursor is in a Text Field, the “Enter Key” Will move to the next Text Field or Button, just like the “Tab Key.” If the Cursor is on a Button, pressing “Enter” will press the button, just like a Mouse click.
6. Shift + Tab: Hold the “Shift” Key while pressing the “Tab” Key to move to the previous Text Field or Button. This moves the cursor in the opposite direction that the regular “Tab” does. (The “Shift” Key has no effect on the direction that the cursor moves when you press the “Enter Key.”
Rental Tab
The
Rental tab has three sub-tabs: Check Out, Check In, and Reports
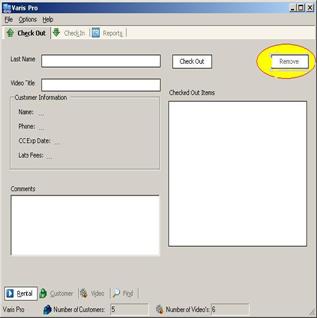
Checkout Sub-Tab
The purpose of the Check-Out sub-tab is to check videos out to customers.
This sub-tab will present the user with information (Name, c.c. expiration date, phone, and late fees) and any other comments pertaining to the customer selected.
What You Can Do:
Check out video(s) to customer(s).
Edit the “Checked Out Items” text box list
How To Do It:
Check out a Video:
1. Select the Rental tab
How? è Point and click once (left mouse button) the Rental tab located at the
bottom left hand corner of the Varis Pro window.
(Note:
Selecting the rental
tab will automatically take you
directly to the Check Out sub-tab)
2. If the cursor is not already located on the “Last name” white text box,
è Press the Tab key on the keyboard or click once (left mouse button) the
white text box to the right of the “Last Name” text.
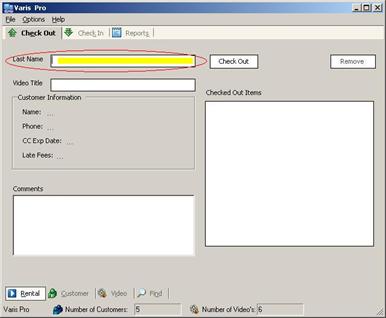
3. Type in the customer’s Last Name.
(Note: As soon as you start typing, the
system will search and find the closest
last names matching your typed text)
4. Select the customer’s name (last and first) from the drop down list.
(F.Y.I- You may either use the down arrow key on your keyboard and hit Enter or point and double click (left mouse button) the desired name)
5. To move to the Video Title’s white text box;
Press the Tab key on your keyboard or click the white text box to the right of
the “Video Title” text.
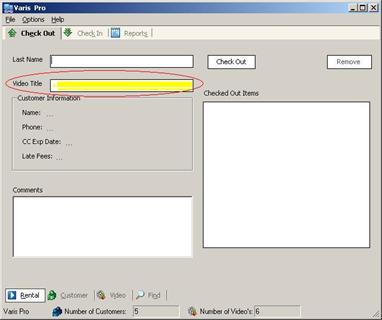
6. Type in the Video Title
(Note: As soon as you start typing, the
system will search and find the closest
Video Title matching your typed text)
7. Select the Video Title from the drop down list.
(F.Y.I- You may either use the down arrow key on your keyboard and hit Enter twice
or point and double click (left mouse button) the desired title)
(Note: double clicking the left mouse button will automatically
introduce the video
title in the “Checked Out Items” text box).

8. Continue to introduce any other video titles into the “Checked Out Items” white text box by following steps 6 and 7 discussed previously. When done, continue to step 9.
9. If you make a mistake and would like to remove a video title from the “Checked Out Items” text box list, go to the section Editing the “Checked Out Items” text box.
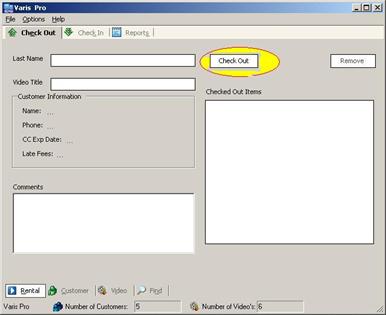
10. Finalizing the process: Proceed to check the video(s) out to the customer:
Click once (left mouse button) on the Check Out button.
(This button is located above the “Checked Out Items” text box which contains
the list of videos the customer wants check out)
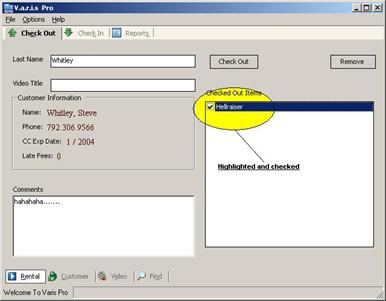
Editing the “Checked Out Items” text box (i.e. Removing a video from the list):
1. Highlight (click left mouse button once) the video title you would like to remove from the “Checked Out Items” list.
(Note:
Make sure that the video title you with to remove is highlighted and checked
as well)
(F.Y.I.: If the video title is highlighted but not checked, double click (left mouse button) the video title. This action will highlight and check the video title.)

2. Finalizing the process: After highlighting the video title,
Click once (left mouse button) the Remove button.
(This button is located above the “Checked Out Items” white text box, which
contains the list of videos the customer wants check out)
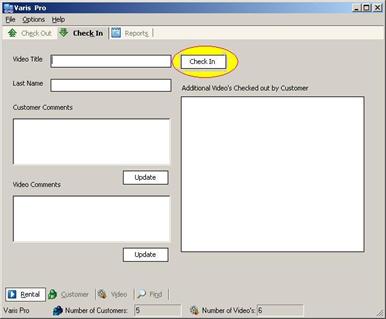
Check In Sub-Tab

The purpose of the Check-In Sub-Tab is to return videos to inventory after a customer has returned them. This Sub-Tab also allows the user to view “Additional Videos Checked out by Customer.”
Check-in video rental(s)
Add comments to the customer’s record
Add comments to the video’s record
Check-in a Video:
1. Select the Rental tab (left mouse click) if you are not already on this tab. (Note: Selecting the rental tab will take you directly to the Check Out sub-tab)
2. Select the Check In sub-tab located below the standard tool bar
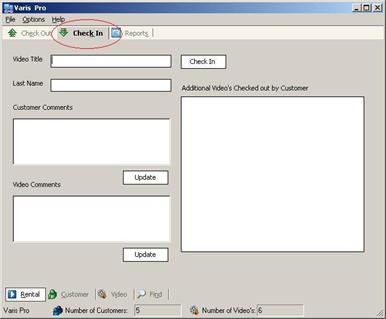
3. If the cursor is not already located on the “Video Title” text box, press Tab or click the text box to the right of the “Video Title” text.
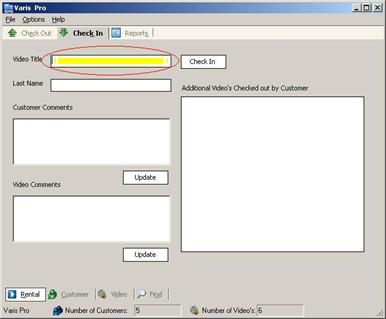
4. Type in the Video Title. (Note: As soon as you start typing, the system will search and find the closest last names matching your typed text)
5. Select the video title from the drop down list (double click the left mouse button)
6. When done, press Tab or click the text box to the right of the “Last Name” text.
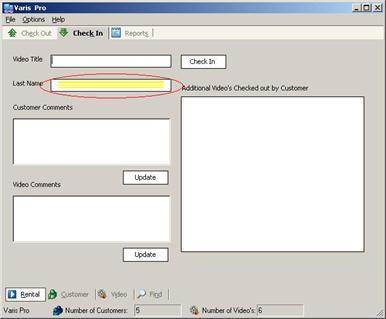
7. Type in the Last Name of the customer returning the video(s) (Note: As soon as you start typing, the system will search and find the closest Video Title matching your typed text)
8. Select the customer’s last and first name from the drop down list (double clicking the left mouse button)
(F.Y.I.: The video title and the customers last and first names are required in order to check in a video)
9. Finalizing the process: Complete the check-In video process by clicking once (left mouse button) on the Check In button. This button is located above the “Additional Video’s Checked Out by Customer” text box which contains a list of videos the customer has checked out. (Note: The information will not disappear when the user presses the Check In button but the transaction has been taken place)
Add comments to the customer’s record (i.e. Returned damage video):
1. If the cursor is not already located on the “Customer Comments” text box, press Tab or click once (left mouse button) the text box below the “Customer Comments” title text.
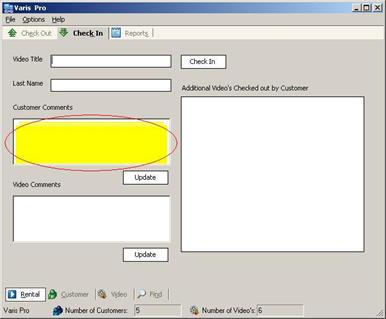
2. Type the comment you want to be reflected on the customer’s record.
3. Finalizing the process: After writing a comment, click once (left mouse button) the Update button located directly below (right hand corner) the text box you typed in your comment.
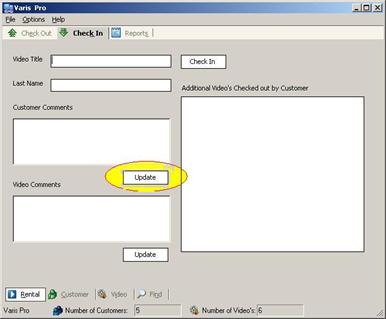
Add coments to the video’s record (i.e. video is damaged):
1. If the cursor is not already located on the “Video Comments” text box, press the Tab key on your keyboard or click once (left mouse button) the text box below the “Video Comments” title text.
2. Type the comment you want to be reflected on the video’s record.
3. Finalizing the process: After writing a comment, click once (left mouse button) the Update button located directly below (right hand corner) the text box you typed in your comment.
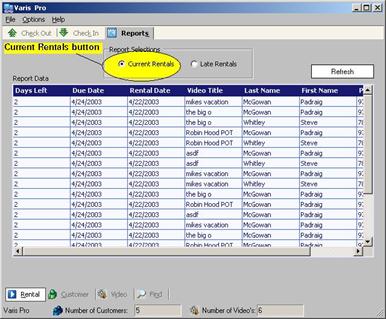
Reports Sub-Tab
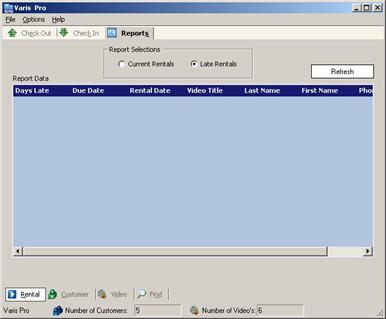
Purpose:
The purpose of the Reports Sub-Tab is to generate reports of current and late rentals.
Generate a Current Rentals Report
Generate a Late Rentals Report.
How to Do It:
Current Rentals Report:
1. Select the Rental tab (left mouse click) if you are not already on this tab. (Note: Selecting the rental tab will take you directly to the Check Out sub-tab)
2. Select (left mouse button) the Reports sub-tab located below the standard tool bar
Customer Tab
The purpose of the Customer Tab is to Add or Remove Customers from the Pop Kulture Database
What you Can Do:
In the Customer Tab, you can do three things: Add a Customer, Edit a Customer Profile, or Remove a Customer from the Pop Kulture Database.
Note: Clearing the Fields: At any Point, to clear the fields, Click on the File Menu, Select “New” and in the “New” Submenu, click “Customer Record.” See Figure Below
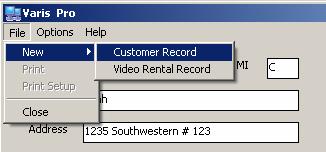
Figure 5: Clearing the Customer Fields
File|New|Customer Record
Add a Customer:
11. Click on the Customer Tab
12. Click in the white text box next to the “Last Name” Field.
13. Type in the Last Name.
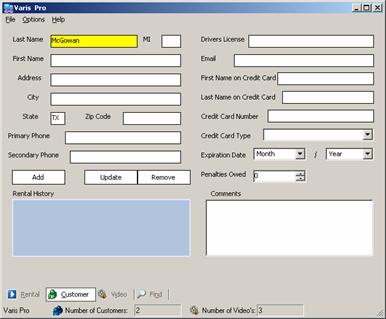
Figure 6: Steps 1-3 of Adding a Customer
“McGowan” has been added to the “Last Name” Field
14. Press “Tab” or “Enter” or click the “MI” (Middle Initial) Text Field to move the cursor there.
**NOTE: Holding the “Shift” Key while pressing the “Tab” Key will cause the tab to move in the opposite direction. See “Navigation” for more information on screen navigation
15. Type in the Middle Initial if there is one.
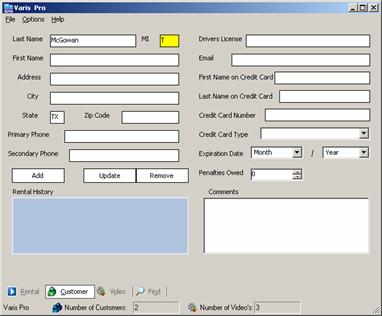
Figure 7: Steps 4 & 5 of Adding a Customer
Middle Initial “T” has been added
16. Continue using the Tab key or clicking text fields to move through the fields and enter customer information.
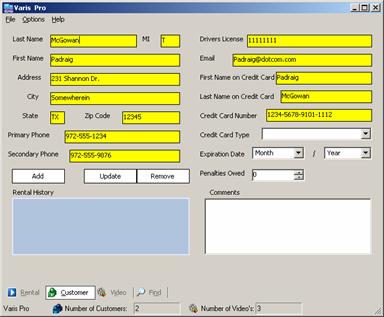
Figure 8: Step 6 of Adding a Customer
Information through Credit Card Number Has been added
17. When you get to the “Credit Card Type” and “Expiration Date” fields, there are 3 ways to add the information:
a. Use the up and down Arrow Keys. Only one possibility will appear at a time. See Figure below.
b. Type the first letter(s) of the correct choice. The choice corresponding to that letter will appear (for example, if you press the ‘v’ key, ‘Visa’ will appear. Pressing ‘d’ will cause ‘Discover’ to appear. See figure below
Figure 9: Step 7
Option a: Arrow Keys & Option b: Type First
Letter(s)
c. Use the Drop-Down Box by clicking on the downward pointing arrow on the right of the text field to scroll through the choices. All possible choices will be shown. Drag the mouse pointer down to the desired choice and click. See figure below
Figure 10: Step 7
Option c: Drop-Down Box
18. Again, Use the Tab key (while holding down Shift to go back) or Mouse to move back and forth between these fields.
19. The “Penalties Owed” Field has an up and down arrow buttons. Click on either of these buttons to make the amount in the Field go up or down to the next unit (Dollar). For example, pressing the “up” button while the field holds the number 4 or 4.25 will cause the amount to go up to 5.
Figure 11: Step 9
Original Amount
in "Penalties Owed"
Figure 12: Step 9
After Pressing
the "Up" Button
20. Once the Customer Information has been entered, tab to the “Add” Button and press “Enter” or Click on the “Add” Button to add the Customer Information to the Database.
21. Clearing the Fields: At any Point, to clear the fields, Click on the File Menu, Select “New” and in the “New” Submenu, click “Customer Record”
Edit a customer’s profile:
1. Click on the Customer Tab
2. Click in the white text box next to the “Last Name” Field.
3. Enter all or the first part of the Customer’s Last Name.
4. Use the up and down arrow keys until the desired record is selected, or click on the desired record.
Figure 13: Steps 1-4 of Editing a Customer’s Profile –
Entering
"s" causes 2 records to appear.
Select one with the mouse or arrow keys.
5. Press “Enter” or Double Mouse Click on the record to select it.
6. The Selected Customer’s Information will appear in the rest of the text fields.
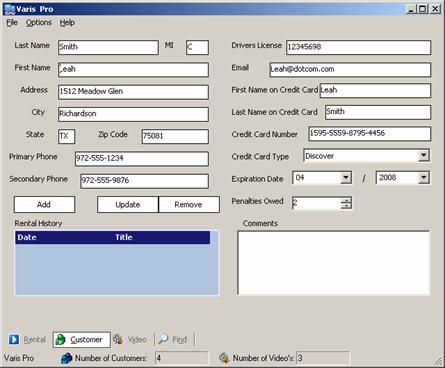
Figure 14: Steps 5&s of editing a Customer’s Profile-
Pressing "Enter" or Double Clicking a record
will cause all of that customer's information to fill in.
7. Click on any text box or use the “tab key” to select any field that needs to be edited.
8. Add the new information.
9. Continue moving between fields and updating information until all of the information is current.
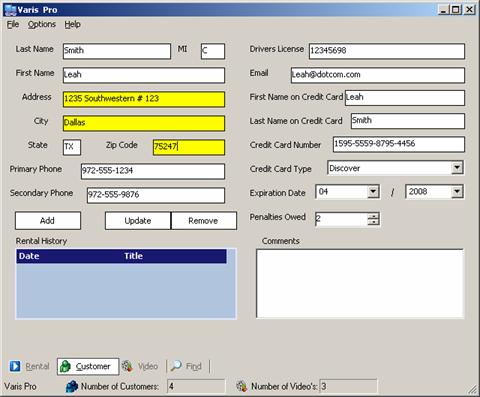
Figure 15: Step 7-9 of Editing a Customer’s Profile –
Address, City and Zip Code have been modified
10. Click the “Update” Button to update the Customer’s Record.
Delete a Customer:
1. See Steps 1-6 of “Edit a Customer’s Profile.”
Click the “Remove” Button to remove the Customer’s Record
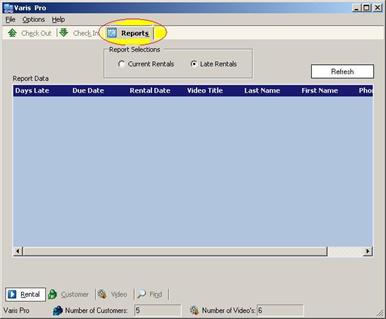
3. Select “Current Rentals” from the Report Selections box located directly below the Reports sub-tab title. (Note: As soon as to select a report from the Report Selections box, the system will begin generating a report on the screen).
(F.Y.I.: This screen will only allow you to view the reports not print them)
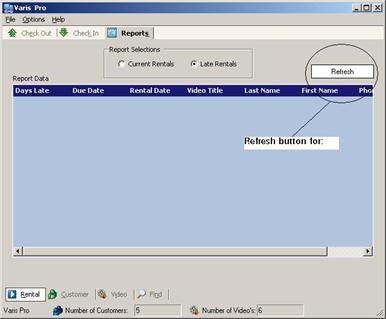
(F.Y.I. Feel free to press the Refresh button to refresh (update) the report appearing on the screen)
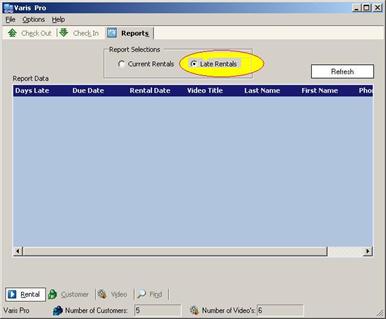
Late Rentals Report:
1. Select the Rental tab (left mouse click) if you are not already on this tab. (Note: Selecting the rental tab will take you directly to the Check Out sub-tab)
2. Select (left mouse button) the Reports sub-tab located below the standard tool bar
3. Select “Late Rentals” from the Report Selections box located directly below the Reports sub-tab title. (Note: As soon as to select a report from the Report Selections box, the system will began generating a report on the screen).
(F.Y.I.: This screen will only allow you to view the reports not print them)
(F.Y.I. Feel free to press the Refresh button to refresh (update) the report appearing on the screen)
Video Tab
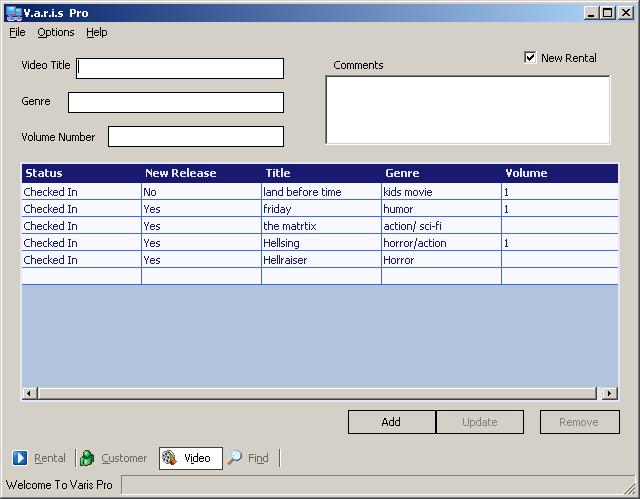
Purpose
The purpose of the video tab is to view or edit information about a video.
What you can do
In the Video Tab, you can do three
things: Add a Video, Edit a Video, or
Remove a Video from the Pop Kulture Database.
How to do it
Add a video:
1. Type the video title in the box labeled ‘Video Title’
2. Type the genre of the video in the box labeled ‘Genre’
3. If the video is part of a set (i.e. Cowboy Bebop Session 3) enter the volume number into box labeled ‘Volume Number’
4. Enter any comments in the box labeled ‘Comments’
5. After all the information is filled out, click on the ‘Add’ button in the lower right part of the screen.
Modify a video:
1. Type the video title in the box labeled ‘Video Title’ and select the video from the drop-down list. This will bring up the video’s information and place it in the text boxes.
2. Make any changes that are needed and click the ‘Update’ button in the lower right part of the screen.
Delete a video:
1. Type the video title in the box labeled ‘Video Title’ and select the video from the drop-down list.
2. Click the ‘Delete’ button in the lower right part of the screen.
Find Tab
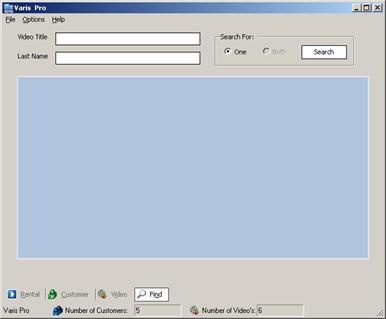
Purpose
The purpose of the Find tab is to find a specific customer or video in the database.
What you can do
In the Find tab, you can do two things: search the database for a customer or search the database for a video.
How to do it
Find Video:
1. Select the Find tab (left mouse click)

2. If the cursor is not already located on the “Video Title” text box, press Tab or click the text box to the right of the “Video Title” text.
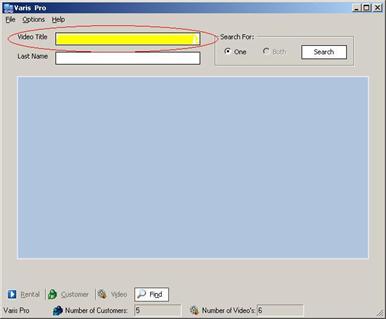
3. Type in the Video Title. (Note: As soon as you start typing, the system will search and find the closest video title(s) matching your typed text)
4. Select the video title from the drop down list (double click the left mouse button)
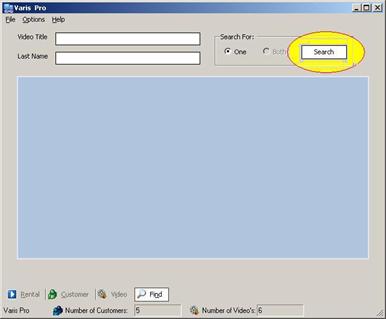
5. When done, Select (left mouse click) “One” from the “Search For” text box located directly to the right of the video title text box.
(Note: you have to options, but select the “One” option)

6. Finalizing the Find process: Clicking once (left mouse button) on the Search button. This button is located in the “Search For” box directly to the right of the option feature.
Find Customer:
1. Select the Find tab (left mouse click)
2. If the cursor is not already located in the “Last Name” text box, press Tab key or click the text box to the right of the “Last Name” text title.
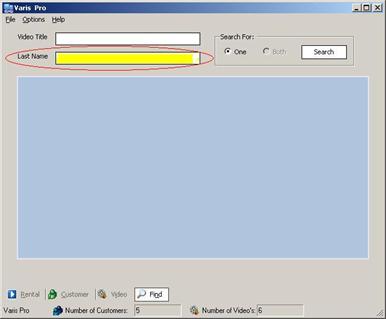
3. Type in the customer’s last name. (Note: As soon as you start typing, the system will search and find the closest last name(s) matching your typed text)
4. Select the (double click the left mouse button) customer’s last and first names from the drop down list.
5. When done, Select (left mouse click) “One” from the “Search For” text box located directly to the right of the video title text box.
(Note: you have to options, but select the “One” obtion)
6. Finalizing the Find process: Click once (left mouse button) on the Search button. This button is located in the “Search For” box directly to the right of the option feature.
Find Both (Video
and Customer):
1. Select the Find tab (left mouse click)
2. If the cursor is not already located on the “Video Title” text box, press Tab or click the text box to the right of the “Video Title” text.
3. Type in the Video Title. (Note: As soon as you start typing, the system will search and find the closest video title(s) matching your typed text)
4. Select the video title from the drop down list (double click the left mouse button)
5. Once a video has been selected, press the Tab key or click the text box to the right of the “Last Name” text to type a customer’s last name.
6. Type in the customer’s last name. (Note: As soon as you start typing, the system will search and find the closest last name(s) matching your typed text)
7. Select the (double click the left mouse button) customer’s last and first names from the drop down list.
8. When done, Select (left mouse click) “Both” from the “Search For” text box located directly to the right of the video title and last name text boxes.
(Note: You have to options, but select the “Both” option)
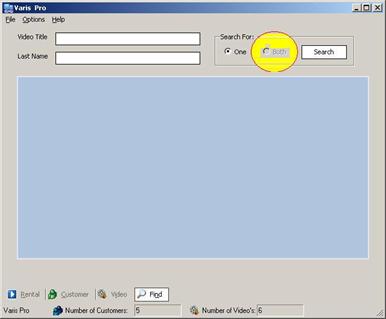
9. Finalizing the Find process: Click once (left mouse button) on the Search button. This button is located in the “Search For” box directly to the right of the option feature.
Troubleshooting
Known bug:
A credit card expires the last day of the month. The program assumes that the last day of the month falls on the 28th, so a credit card expires on the 28th. Thus, if a credit card expires on the 31st of January, it will show that it is expired from the 28th instead of 31st.
Error Messages:
Unhandled exception: Occurs if MySQL not setup correctly.
Example:
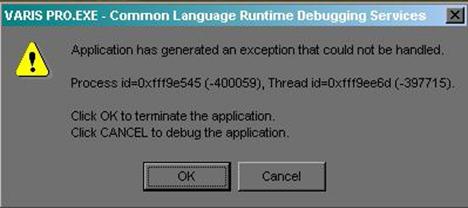
Resolution: Run the dbaseinstall.bat file in the Varis Pro directory.
Program errors: Any errors that occur during the program is running,
Example:
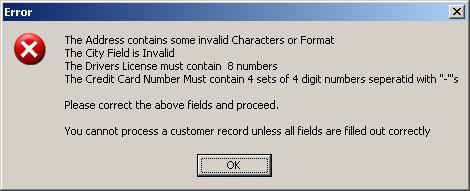
Resolution: Do what the program says.